Make a Neck Pocket Template
Commercial neck pocket templates usually don't work very well. They tend to leave you with a poor fitting joint between the neck and the body of the electric guitar. There are ways to try and fix the issue but none that I have been very happy with.
In books, and on the internet, you can read about using various methods involving complicated setups, but no matter what I tried, I was always left thinking there has to be a better way...
Sure enough, there is. Below is a description of how to make the ultimate template for a perfect fitting neck joint. Best of all, its cheap, easy, and doesn't require a whole lot of tools.
Materials
The materials you need are inexpensive and commonly available at your home improvement store or online merchants such as Amazon.
Template Material
 Hardboard template material on wax paper
I use 3/16" Hardboard as a template base material. A piece 12 x 10 inches is a good size. Any smaller and it may be difficult to find room to clamp it to the guitar while you route the pocket.
Epoxy Putty
 JB Weld brand Epoxy Putty
This is one of the more critical items. I have tried a fair amount of different epoxy putties and found my favorite is Kwikwood by JB Weld. I find it has a longer open time than most other epoxy putties, so it leaves more time to work it.
There are others that work well too though, and feel free to experiment. I would avoid those with metal shavings in them though, since hardness and strength isn't critical. Much more important is being able to fill the crack. The templates I've made have only been used once or twice. Compare the time it takes for the putty to set between products. The JB Weld Quikwood sets in 15-25 minutes and I wouldn't want any less than that.
Packing Tape
I use a Scotch (by 3M) clear heavy duty packing tape about .003" thick and regular smooth office tape. Don't use thick tape, fiberglass reinforced or masking tape since a smooth surface is important. You'll need about a foot-long piece.
Wax Paper
Wax or parchment paper is used as a barrier so the Epoxy putty won't stick to your tabletop. Seran wrap or a trash bag may work as well. I like the paper as it is less prone to wrinkles.
Disposable Gloves
Epoxy can have some nasty health effects. The gloves are to protect your hands from contact with the epoxy putty.
Tools
Power Tools
A jigsaw is necessary to rough-cut a pocket in the Hardboard. I would imagine a scroll saw or band saw would work just as well. Using a drill to relieve the two corners makes it a lot easier to cut the pocket in one pass.
Stiff Putty Knife
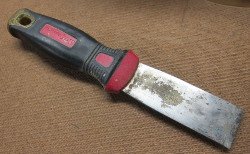
This is used to cut off a piece of epoxy putty before it is mixed, and more importantly, to work the putty into the gap between the neck heel and the hardboard.
Clamps
Three clamps to hold various pieces in place. I would recommend one being a cam clamp as seen in the pictures below, or a Quick-Grip bar style clamp. The other two can be simple spring clamps or almost any other variety. I would avoid C-clamps or any kind that incorporate a screw as they tend to twist the work piece as pressure is applied.
Sand Paper
80 and 120 grit approximately.
Scraper, X-acto or utility knife
This is to take the edge off after the epoxy putty has set. Always use fresh blades.
Making the Template
Cut out a piece of Hardboard
As mentioned earlier, aim for 12 x 10 inches, give or take. At least one of the long sides needs to be reasonably straight. At the middle of this edge is where the pocket needs to be cut.
Mark and cut out the pocket
Lay the neck to be fitted on the hardboard piece. Line it up roughly at the middle of the board and line it up so the template extends passed the point on the neck where the edge of the body is to end up. Clamp or hold the neck firmly to the hardboard while you trace the heel with a pencil or fine point sharpie.
Now cut out a pocket. The pocket should be cut big. I typically cut right on top of the line or just outside. In the end you want a approximately a 1/16" gap all around the neck.
Mask the Heel of the Neck
Tape the sides of the neck heel. The tape needs to cover the sides all the way down to the bottom contact surface. Work out any wrinkles or bubbles.
Line it all up
 Note the gap between the neck heel and the hardboard template material
Lay down the wax or parchment paper on a flat surface as a barrier so the Epoxy putty won't stick. Set the neck heel on top of the barrier material and clamp it down with the cam or Quick-Grip clamp.
I let the majority of the neck hang out over the edge. Line up the Hardboard with the cut pocket around the neck leaving an even gap all around. Secure the hardboard with a couple of clamps.
Mix the Putty
Mix the epoxy putty according to the manufacturer's instructions. Be speedy so you have time to work the putty before it cures.
Work the Putty into the Gap
 Epoxy putty roughed into the gap
By using a small amount along the edge of the putty knife, work the putty into the gap. I generally start by quickly placing a "worm" of putty into the three sides before I start packing it in hard. By adding physical material in the gap, the pressure from packing has a harder time pushing the neck and board out of alignment.
 Here the epoxy putty is packed tight and smoothed out - ready to cure
Excess putty has to be cleared off the putty knife regularly and worked back into the gap. Try and work quickly. Lastly, smooth it out by working the putty knife from the side of the neck and down-and-over the hardboard all around the neck. Once the entire gap is filled all the way to the edge you're done. Leave it alone, let it cure and clean up - especially removing putty from the putty knife.
Let it Cure
I generally let it cure over night.
Clean up the Neck Pocket Template
 Neck pocket template cleaned up
After letting the putty cure over night, remove the clamps. Carefully work the neck out of the template by twisting it ever so lightly until it lets go. Typically the putty will release from the surface of the tape. Remember to pull the neck straight up as the heel is the widest part. Peel the tape off the neck heel.
Next, lay the template on a flat surface and sand the hardened putty flush with the top of the hardboard. Flip it over and do the same. At the bottom edge of the neck pocket template, there may be a ridge formed by the bottom radius of the neck heel. Use the scraper or knife to lightly scrape it back flush or slightly beveled back. Try not to disturb the surface where the epoxy was touching higher up on the heel, because this is where the bearing on your pattern bit will run. In fact, you may be able to trim this material by using the 3/8" diameter router bit.
Mark the Center Line
 Finding centerline
A good template has an accurate center-line to aid the use and alignment of the template to the guitar body.
I've found the best way is to lay the neck into the template and lining up a straight edge to the side. Mark a line along the straight edge. Repeat on the opposite side.
Along these two lines, make two sets of tick-marks a set distance from an arbitrary fret and repeat on the opposite side. The further apart the two sets the better. Connect the two tick-marks in each set. Mark the center of these lines and draw a line between the two centers.
Neck Pocket Template in Use
Neck pocket template made in this manner will produce perfect fitting pockets every time. See example below.

Recent Articles
-
Speaker Plans
Feb 04, 18 05:23 PM
 Speaker plans for download - free pdfs for DIY builders and tire kickers